How To Guide: Test Execution Report Using the Data Warehouse
Introduction
Document explains steps for generating test results report for all test runs under a test plan and test suite. Please follow the below report generation steps.
One-time set-up for the Azure Cosmos DB ODBC driver
- Please note that you should have Administrative account on the sytem you are using to complete the setup. You can request System Admin rights by following your company policy before installation.
- Download and Install Azure Cosmos DB ODBC driver based on the Excel application and the OS specifications. Please check the specification of your Excel application(32 bit/64 bit) by navigating to File -> Account -> About Excel. Also based on your system type (32 bit OS/64 bit OS), you will need to determine a suitable installer from the Microsoft site here. For example,
- If you are using Excel application of 64 bit on a 64 bit OS, then choose the first installer from the list.
- If you are using 32 bit Excel on a 64 bit OS, then choose the second installer.
- And if both your Excel application and the OS are of 32 bit choose the third installer.
- Complete the installation wizard using the default input.
- In the Start menu type odbc -> locate the application 'ODBC Data Sources Admin (64-bit/32-bit based on the installed driver)' -> Right click -> Choose 'Run as administrator'.
-
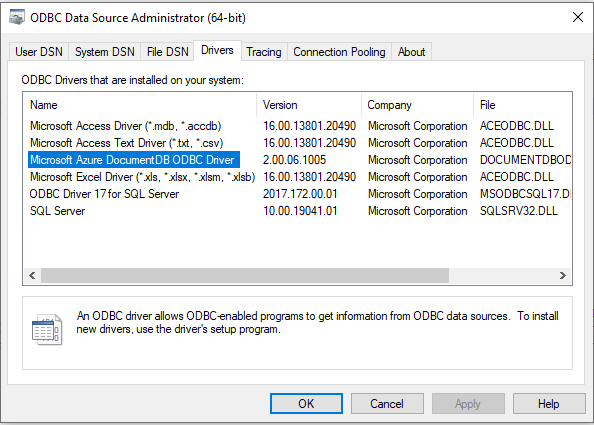
Navigate to the ‘Drivers’ tab. Ensure that the driver Microsoft Azure DocumentDB ODBC Driver is listed under the available drivers.
-
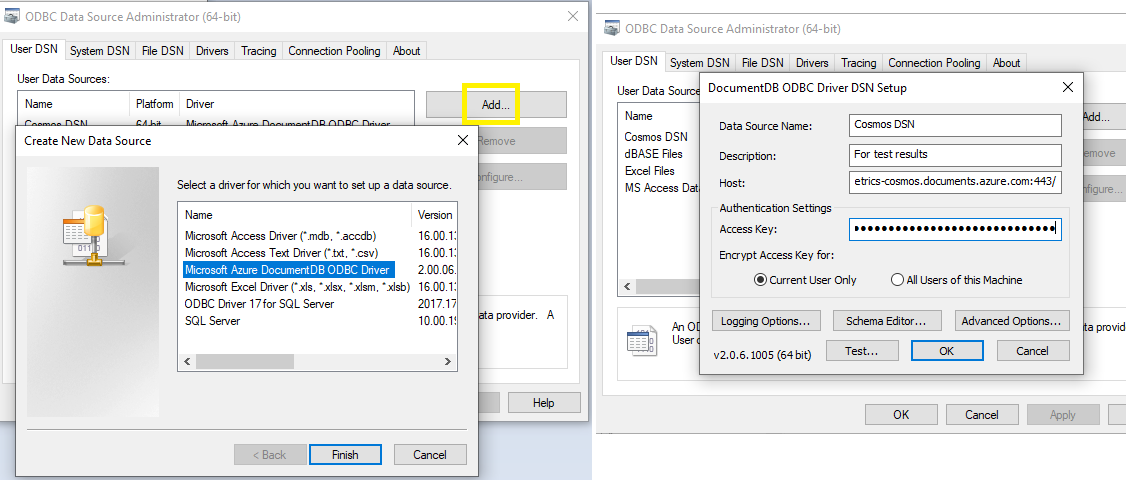
On the same ODBC Data Sources Admin window, navigate to the User DSN or System DSN tab. Click on the Add button
- Choose 'Microsoft Azure Cosmos DB ODBC Driver' and Click Finish.
-
Provide a meaningful data source name (e.g. Cosmos DSN) and add description --> Enter the host name and the read-only access key.
- Host -> https://azdo-metrics-cosmos.documents.azure.com:443/
- Access key -> Navigate to the cosmos db account on the Microsoft Azure Portal here. Click on Read-only Keys tab -> Copy the PRIMARY READ-ONLY KEY.
-
Click the Test button to verify the connection to the Azure Cosmos DB account. Ensure SUCCESS! message is shown.
- Click on the 'Advanced Options' and enter the following values
- 2018-12-31 for REST API version
- Session for Query Consistency
- Click OK on all the popup windows.
- Open Registry Editor Admin application. In the Start menu, type 'regedit' -> Locate 'Registry Editor' -> Right click -> Choose 'Run as administrator'
- In Registry Editor, navigate to the path: Computer\HKEY_LOCAL_MACHINE\SOFTWARE\ODBC\ODBC.INI
- Right click on ODBC.INI folder -> Select New -> Key option. Name of the key should be same as the DSN created in the above step, e.g. 'Cosmos DSN'.
- Navigate to the key -> Right-click to add a new String value with name IgnoreSessionToken and value as 1. In order to add value for a key, right click on the key name and select the Modify option.
Create a new report
- Open Microsoft Excel. Under Data tab, choose Get Data -> From Other Sources -> From ODBC.
- Select the DSN created in the above step from the dropdown and expand Advanced options.
-
Paste the below statement in the SQL statement textarea and click OK.
SELECT testPlanName, testSuite_name, testSuite_id, testCase_id, testCase_name,
testRun_id, testRun_name, outcome, completedDate, releaseReference_name,
releaseReference_definitionid, releaseReference_environmentid FROM [testresults-testrunid]
- Click OK. - Choose 'Default or Custom' option. You do not need to enter the credentials. Click Connect.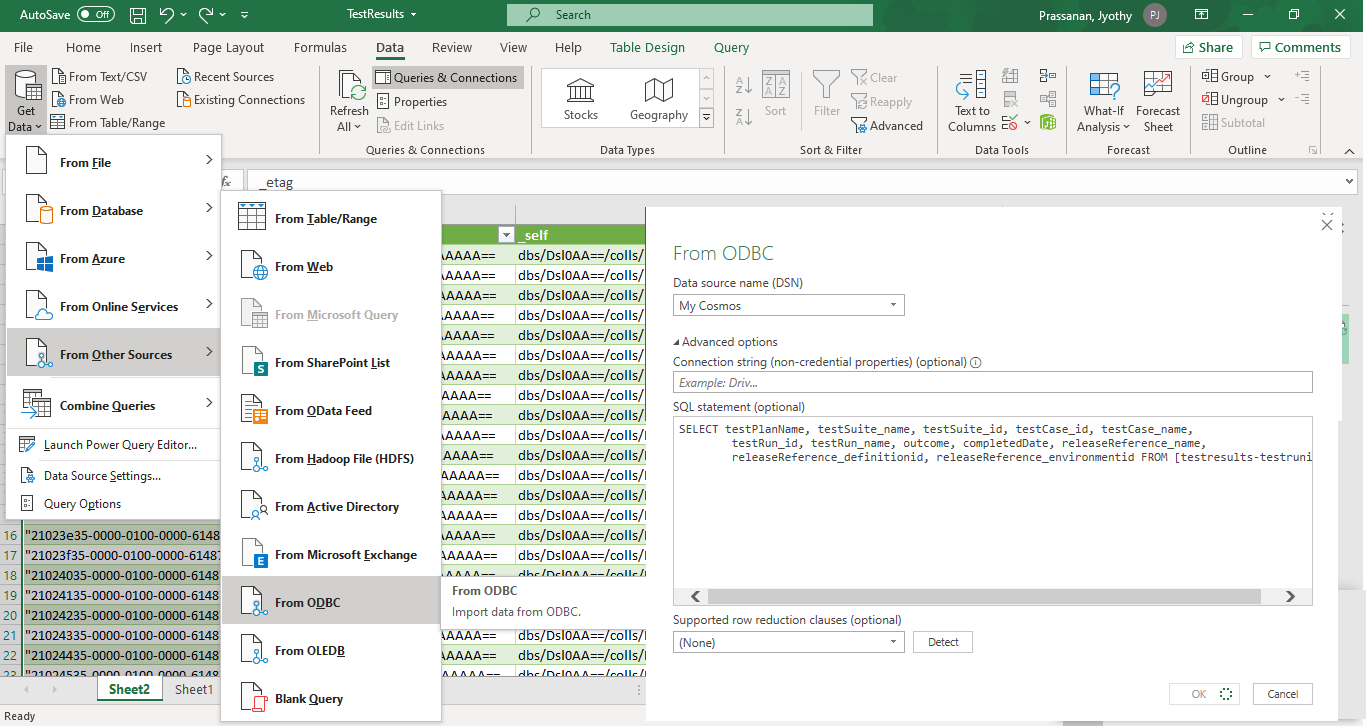
-
Click on the Load button. Please wait until the query is executed and the data is loaded.
-
Data should be loaded successfully. Apply excel filters to view single test plan details.

-
Get the latest data by navigating to the Data tab and selecting the Refresh All option. Please note that the data in the cosmos db is refreshed every 2 hours.
References
https://docs.microsoft.com/en-us/azure/cosmos-db/sql/odbc-driver